Pinagem arduino uno. NodeMCU ESP8266: Detalhes e Pinagem 2020-02-04
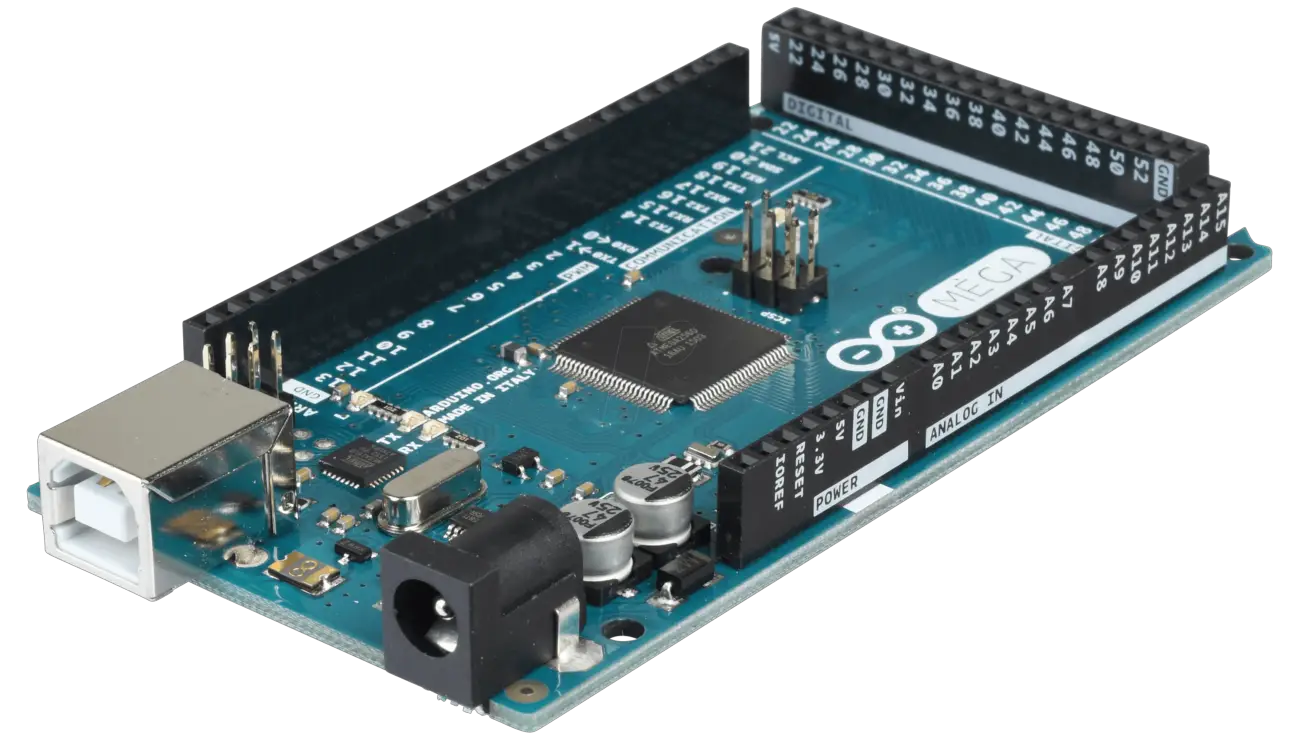
Arduino Mais: Detalhes sobre o Arduino Uno

Refiz a solda toda novamente dos conectores. By applying a small load, the current draw is increased, and the motor starts to behave. I modified the Blink sketch my adding 'Serial. Thanks for all great project!!!!!! To read these analog values, use the AnalogRead function. The stepper on the x axis moves much slover as the one that is on the y or z axis. .
Next
Connecting Grbl · grbl/grbl Wiki · GitHub

The end stops are little switches that you connect to the pins on the board and they will stop the machine if it reaches its maximum capabilities. Hardware 1 x Arduino Uno 1 x Arduino Joystick Shield v2. So when I send some air or water throught the flowmeter, the info on the monitor changes from zero to one, repeatedly. Hello, First of all thanks for all your work, without that I could not do this small project on university. Por fim,também transforma o terminal A1 em uma entrada digital para ser utilizada com digitalRead.
Next
Arduino Mais: Detalhes sobre o Arduino Uno
Indico fazer um material acadêmico. I wil thank a lot any help— You are receiving this because you commented. Ainda faltam as instruções específicas mas em breve estarão disponíveis. This is my code which I am interfacing with NodeMcu Amica Board. Reply to this email directly, view it on GitHub , or mute the thread. Resources Method Two: grblshield Last Updated: 2012-02-21 by aldenhart. Por fim, também transforma o terminal A0 em uma entrada digital para ser utilizada com digitalRead.
Next
Arduino CNC Shield

The problem went away with a very slight load on the stepper shaft. The power does not feed into the Arduino, so don't worry about frying it. Using Logic Level Converters to switch from 5V to 3. Os conectores de cada lado da trilha podem ser soldados para reabilitar esta função. Does anyone know if I can configure something or set a jumper in order to get them high? If you wanted to have a fourth axis separate, like for an Extruder or something, you could have take the spindle enable pin, and the spindle direction pin, and make those direction and step. Se tiver algum conhecimento em micropython poderia me explicar oq pode ta acontecendo? For example: — The X-axis travels positive and reaches the positive end switch — The X-axis is being stopped — I press reset — The X-axis is enabled to travel to the negative direction only as long as the positive end stop is still active. If I do the same sequence line after line, it will work even if the file has been removed and there is no such file anymore.
Next
O Maior Arduino UNO do Mundo

You can test to verify the circuit is working by taking the jumper wire from D2 and plugging it intoeither +5V or +3. The potentiometer should be at the bottom of the board. Can be a dummy question, but I tryied with all configurations that I found on the google to turn on the onboard led! No idea, jury's still out. The delay 500 command waits for 500 msec. I wil thank a lot any help you tried this example? Connect the minus of the battery to the emitter of the transistor E pin and also connect the emitter of the transistor to Gnd on the Arduino board. Here is where you have to hone your skills at code debugging. When I try to move the Z axis this remain stop, and the others motors make a noise.
Next
Tutorial LCD com Arduino

Not even sure what program you used to create the files themselves. Sign up for a free GitHub account to open an issue and contact its maintainers and the community. But how do you supply power to 4 stepper controls? The range of these models makes for choosing the right one for your shop pretty easy, the more expensive and larger ones typically 3040 and 6040 will have the more accurate ball screw type linear movements instead of a typically trapezoidal lead screw. . Reply to this email directly, view it on GitHub , or mute the thread. Homing and hard limits use the same switches. I hope you found this guide useful.
Next
How To Use SD Card with Arduino

By using the Spindle enable, direction and the coolant control pins for signals I can create a shield that activates an extra extruder stepper driver with the spindle enable pin. Now you can write to the file using this. All liabilities are on the users at their own risk and they take full responsibility for any harm that might happen to them or their property. This is because the standard Arduino 3. That means that when we read a value of between 493 and 553, we will assume that the user is not pressing the joystick. Gpio2 is also where the onboard blue led is attached.
Next
Arduino CNC Shield

Com iniciativas como o projeto Franzininho e projetos na área de educação, leva a cultura maker para o Brasil capacitando e incentivando professores e alunos a usarem tecnologia em suas vidas. Don't throw it out, there are likely some awesome electronics components you can salvage from it. You can also send raw gcode if you want to. Estes Pinos operam em 5 V, onde cada pino pode fornecer ou receber uma corrente máxima de 40 mA. Hoje é diretor de operações do portal Embarcados, onde trabalha para levar conteúdos de eletrônica, sistemas embarcados e IoT para o Brasil. So a 1205 thread is 12mm diameter and 5mm thread size, so on and so forth. Whenever a user presses a pushbutton, the Arduino will display the button value on the serial monitor.
Next